How to use the microipet laboratory is the work that is not you would also understand when buying electronics in the micropipet laboratory equipment company ! This article will answer the details that matter – We started would !
Micropipet is gi ?
Micropipet one is a common tool in the professional laboratory of molecular biology, chemical and pharmaceutical products. Combined with the were sterile pipet con with many different volume can be used 1 times or more times.
Use the pipetman to transfer 1 small liquid volume is usually 0.2 microliters to 1000 UL or a few different mililit through the corresponding taper head from this solution to other liquid solution.
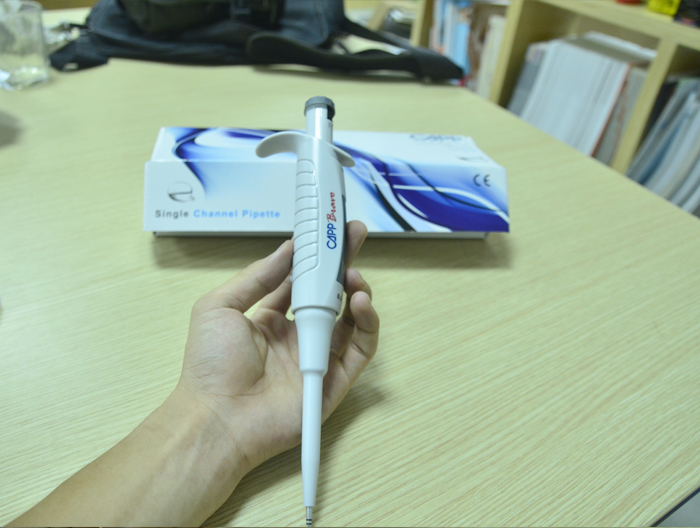
The micropipette is often coded by volume-are for example: P2 – P20 – P200-P1000.
Table of volume and accuracy under a common symbol of the Pipet
|
Micropipette |
Minimum volume (UL) |
The largest volume (UL) |
|
|
P2 |
0.2 |
2 |
|
|
P10 |
1.0 |
10 |
|
|
P20 |
2 |
20 |
|
|
P200 |
20 |
200 |
|
|
P1000 |
100 |
1000 |
|
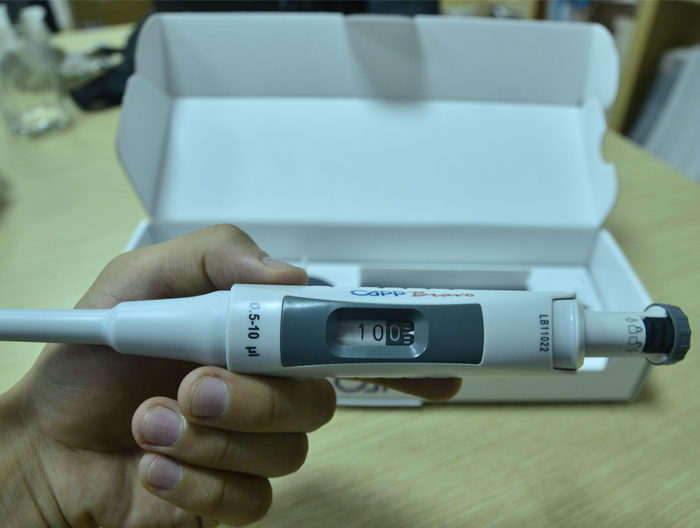
Look at the front of the micropipet , you will see a blank box with 3 the figure is inside it. Below is a chart to help you can find the maximum values are the norm in each a different size of the pipet. Exceeding these values means electronic pipet was located outside the calibration range. In addition, next to each box below are the numbers that it represents. Therefore, Please take the time to read them to avoid damaging the pipet when dialing in excess of the permitted range of it.
The following illustrations help you read exactly the volume recorded on the micropipette:
The accuracy when using very high electronic pipet to some Microlite user therefore need proper implementation of the guiding principles using a Micropipet Electronics as recommended by the manufacturer.
The principle of using a Micropipet basic electronics (not everyone knows)
Never be used to fetch the external volume Pipetman about largest measurement: This will cause incorrect results
- Measuring range selection of the micropipette is suitable for your work ?
GENERAL RULES: Always select the SMALLEST size to pipet to your desired volume level . This will help you achieve the highest possible accuracy. Please note that the accuracy will decrease when you use the large size not pipet needed to norm 1 small volume.
- Set the desired volume by twisting the round button in the center according to the clockwise if you want to increase the volume or counterclockwise turn clockwise if you want to reduce the volume.
P10: Maximum volume: 10 µl. Micropipette will norm be correctly when the volume range 1 µl- 10 µl. Indicator appears on the micropipette (There are usually black-Black-Red) be read as XX. X µ l. The change in color indicates the decimal part.
P20: Maximum volume: 20 µl. Micropipette will norm be correctly when the volume range 2 µl- 20 µl. Indicator appears on the micropipette (There are usually black-Black-Red) be read as XX. X µ l. The change in color indicates the decimal part.
P200: Maximum volume: 200 µl. Micropipette will norm be correctly when the volume range 20 µl- 200 µl. Indicator appears on the micropipette ( often there are 1 coloring) be read as XXX µ l.
P1000: Maximum volume: 1000 µl (= 1 ml). Micropipette will norm be correctly when the volume range 200 µl- 1000 µl. Indicator appears on the micropipette ( usually have red – Black – Black) be read as X. XX ml. Please note that this number is only read by ml micropipette while the remaining types read according to µ l.
- Load the sterile tip top: Use the blue tip pipet tip clean and P1000 for for P200 and the entire electronic pipet smaller size. Use a filter when using the PCR or RNA. Remember to close the lid after use to maintain sterile properties.
ATTENTION: Not allow the pipette tip top tap any object would (including gloves, clothing, the skin or hair). - Instructions-templates when using electronic micropipette
Pit-Tong will stop in 2 different points when it is compressed down. Push pit- real tones slowly down the first position: This is the volume needed-. Because the first stops depends on the volume to be tv guide, Therefore, the distance to push pit-Tong reached first will change depending on the volume are the norm.
While keeping pit-Tong at the latest mass downloads, latest top tip on in the solution so that it is embedded 1 making just enough covering the tube head end ( depth of 3-4 mm above the liquid) , the first tip is embedded not too deep.
From the drop-out to pit from the obtained liquid volume, ensure that still keep the head tip is embedded in the solution.
ATTENTION: If the solution you are the norm in the form of make, Let the top tip of the pipette to the largest volume dipped before the withdrawal early tip out to avoid appearing bubble and leading to the determination of the volume is not exactly.
![]() See also other products at : Hanoi's laboratory instruments
See also other products at : Hanoi's laboratory instruments
Check again to be sure of the accuracy, There should be about not (air bubbles) in the end of the pit-Tong.
- Provides sample (put a solution from the first con in out): The second stops can be found when pit-compressed tones down beyond the first contact point until it is in contact with the body of the pipette. The second stop was used to complete the discharge of aqueous effluent out the top con. You should not reach this second stops when currency solution into the pipet, unless push out the last drops.
To move the sample volume , need:
- Latest top tip into the tube or the average received
- Compress the pit-Tong down the first point
- Wait 1 seconds
- Continue compressing the pit- cardboard down the second point 2 -It will discharged the entire liquid.
- In the end, withdraw the head tip out the average received but not yet release the plunger.
- Remove the top tip: While holding the top of the tip in the jar rather than proper waste, the first push button con .
Important warnings when using electronic pipet:
- Never been driven pipet up above. This makes the liquid that flows downward micropipet and damaged the pipet.
- When withdrawing liquid out electronic pipet, Remember to drop pit-Tong 1 the way from from. This prevents the liquid from being rushed into the end of the pipet and do it is blocked. This is especially important for large size pipet (200-1000 µl)
- Make sure to use the correct size of the top tip for each of the pipet.
- Always remember to use a new tip for each kind of different liquids.
- Using the pipet is suitable for the volume should be the norm. Do not ever use the pipet 200-1000 µ l to volume limit under 200 µl. Quota volume beyond the scope of the micropipette (too high or too low) all can cause damage to the device.
- When fitting the top top con tray micropipet into thugs need to retrieved from outside in and in what order. not to be taken anywhere.
The technique for small volume
For small volume, especially in the range 1-10 µl, you need to keep track of each small drop as the norm.
Especially be careful removing each small drop in on of the test tubes so you can see it, withdraw the head tip out 1 carefully before removing the pit-Tong.
If the added 1 larger quantities, need to flush 1 liquid solvents for the early tip after removing the small drop to ensure that you get the whole liquid was the norm. With a small amount then you often have to centrifuge and then swirling test tubes to get the perfect mixture of reactants.
Simple test for correct calibration
Check the calibration of micropipette by using 1 ml of water has a mass of 1 g is the reduction of the ion or distilled. Quota volume range is from range use of pipette . Pipette errors >5% should be edited again.
![]() Next view : How to calibrate and check the Micropipet
Next view : How to calibrate and check the Micropipet


Readers comments (3)